Grouting shower tiles is essential for maintaining a clean, waterproof, and durable bathroom. Proper grout application prevents water from getting behind tiles and causing mold or damage.

What Is the Best Grout for Shower Tiles?
Choosing the right grout is the first step to a successful shower installation.
There are two main types of grout:
· Sanded grout: Ideal for wider joints (typically over 1/8 inch). It contains sand, making it stronger and more resistant to cracking.
· Unsanded grout: Best for narrow joints. It has a smooth texture and is easier to apply on delicate tiles.
For shower areas, you should also consider specialized grout options:
· Epoxy grout: Highly water-resistant, stain-proof, and extremely durable. It’s perfect for wet environments but slightly more expensive and harder to apply.
· Mold-resistant grout: Designed to prevent mildew and staining, making it ideal for bathrooms.
At OYH, we recommend using high-performance grout with waterproof and anti-mold properties to ensure long-term protection.
How to Choose the Right Grout Color for Shower Tiles?
Grout color plays a major role in the overall design of your shower.
· Contrast color: Creates a bold, modern look (e.g., white tiles with dark grout).
· Matching color: Provides a seamless, clean appearance and makes the space feel larger.
Here are a few practical tips:
· Light-colored grout looks elegant but shows stains more easily
· Dark grout is more forgiving and easier to maintain
· Always consider your bathroom style and lighting
Choosing the right grout color, along with a reliable waterproofing system, ensures both aesthetics and performance.
How to Grout Shower Tile Step by Step?
Follow these steps for a professional finish:
1. Prepare the Surface
Make sure tiles are clean, dry, and free from dust or old grout. A clean surface ensures proper adhesion.
2. Mix the Grout Properly
Follow OYH product instructions carefully.
· Too much water weakens the grout
· Too little water makes it difficult to apply
Aim for a smooth, paste-like consistency.
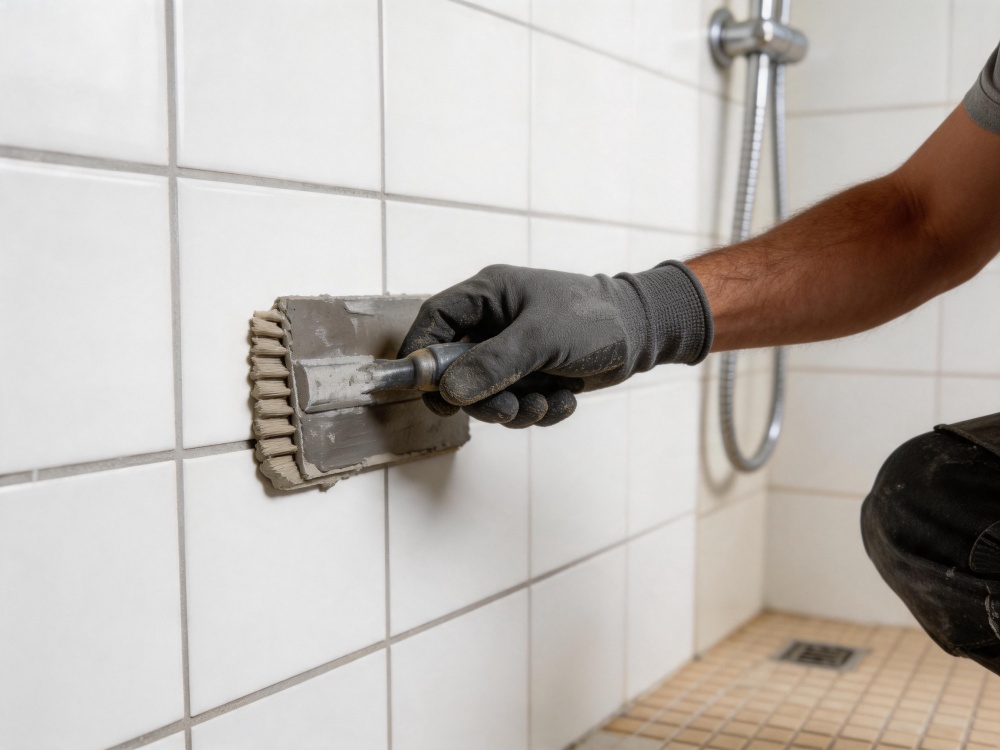
3. Apply the Grout
Use a rubber float to press grout firmly into the joints.
Work diagonally across the tiles to ensure all gaps are filled evenly.
4. Remove Excess Grout
After application, wipe off excess grout using a damp sponge.
Do this gently to avoid pulling grout out of the joints.
5. Let It Cure
Allow the grout to cure fully (usually 24–48 hours).
Avoid using the shower during this time to prevent cracks or weakening.
What Mistakes Should You Avoid When Grouting Shower Tiles?
Many common grout problems come from simple mistakes:
· Incorrect mixing ratio, which leads to weak or crumbly grout
· Rushing the application, resulting in uneven filling and gaps
· Using too much grout, making cleanup difficult and leaving a messy finish
· Skipping surface preparation, causing poor adhesion
· Using the shower too early, which can lead to cracks and mildew issues
Taking your time and following proper steps ensures a smooth, durable result.
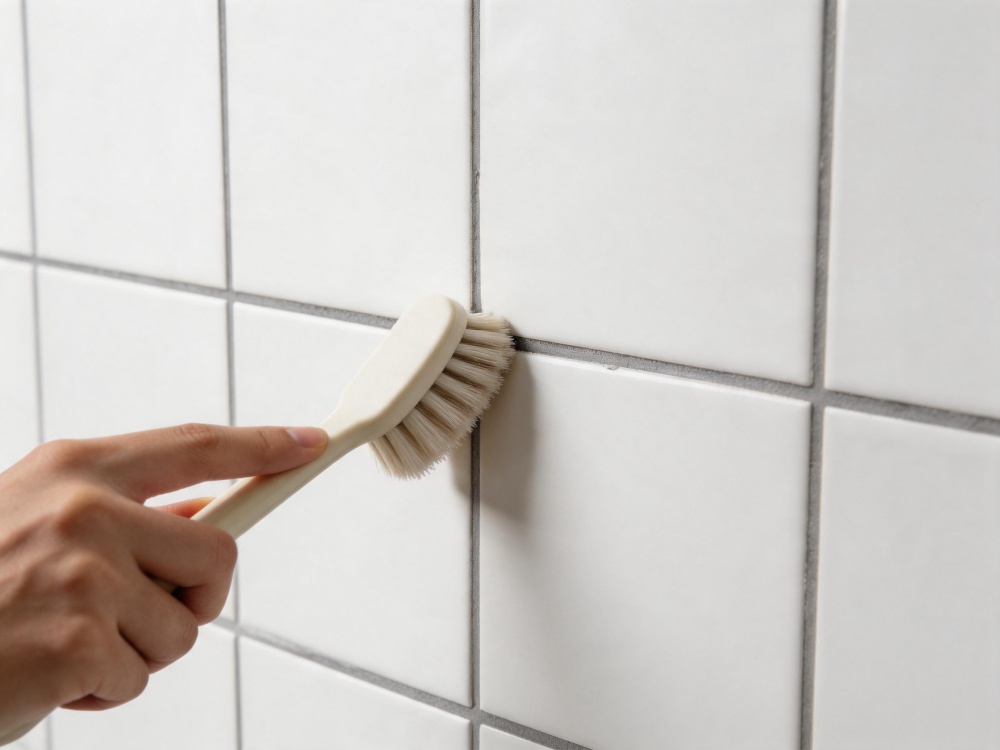
How to Clean and Maintain Grout
Proper maintenance keeps your grout looking fresh and extends its lifespan. Clean it regularly with a mild cleaner or a vinegar-water solution, use a soft brush to remove dirt without damaging the surface, and rinse thoroughly to avoid residue buildup. Apply a grout sealer once a year for added protection. If cracks appear, repair them immediately using a professional grout repair solution from OYH to prevent water leakage and further damage, and always clean mold early to stop it from spreading.
Do You Need Waterproofing Before Grouting Shower Tiles?
Yes—waterproofing is essential.
Before tiling and grouting, applying a waterproofing membrane ensures that water does not penetrate into walls or floors. Grout itself is not 100% waterproof, so this extra layer is critical for long-term performance.
OYH provides complete waterproofing and tiling systems to ensure your shower remains leak-free and structurally sound.
Conclusion
Proper grouting improves durability, prevents mold, and keeps your shower looking clean. Choosing the right materials and following correct steps ensures long-lasting results.

0 Comments